Sunday, February 27, 2011

Seaside Tissue box cover


I made this for my SIL and BIL - their downstairs bathroom is an adorable seaside theme.
The tissue box is a pattern I learned online (search tissue box on my blog to get the link). I had to tweak the original design to fix the Puffs plus lotion tissues that I buy.

I cut out panels to emboss at 4 1/2 x 4 1/2
The sea shells are from Stretch your Imagination Cricut cartridge at 4 3/4"

The border is a Martha Stewart punch

Saturday, February 26, 2011

Birthday pop up


We are heading out my BIL's today and I was just told it was his birthday 2 weeks ago (10th!). OMG
I must make a birthday book to remember all these birthdays! So after a meeting I had tonight I had to try and make a masculine card.

Here is what i came up and finished at midnight, too tired to post then I am posting now....
Stamp image is from Inkandinkado Illuminata. I used SU ink and ribbon Wild Wasabi on cream colored paper. I wanted something different so I used the highlighted method as seen in the rust colored circles cut from my Coluzzle.

Inside I did a pop up - also stamped in my stash from SU! And ran an embossed border from the clocks Cuttlebug folder
I smashed a bottle cap in my Cuttlebug and proceeded to die cut a circle from my Cuttlebug and stamp a little candle on it. It is suspended off the ribbon by 28 gauge wire.

I am entering this card in the following challenges:
Priscillas styles - use Layout
Fabulous Friday's use metal
Cuttlebug spot pop it up
Kaboodle Doodle - a fold we have not used in awhile
Simon Says - Coffee and cream color theme
Tuesday Throwdown - a 3D creation (Thanks coach fan!)

Wednesday, February 23, 2011

Early Spring Hello


This is my last week as Guest Design Team member at C.R.A.F.T challenge blog.
Here is a card I used with the color theme chosen.

I bordered it with a Martha Stewart punch and the circles were punched using Creative Memories punches.
Flowers by Prima, pearls from Michael's

I used the layout from Card Patterns #103

Less is More - spring

Blog Award from Patti

I received this blog award from Patti
https://blogger.googleusercontent.com/img/b/R29vZ2xl/AVvXsEiEhjTzY9HwWHQh7n1iIBp-e2c0RPuSdnVN-QP5c7iOzm1iVrPnjXkBAuMtdHL9q64SVD8u1uY4qz8krE25X06bSHOiASzt6bDbEc4T8HDPCZfdbTZ9_SJEl9qH1KlK5_MwAlIgtAW6fv1j/s1600/Liebster_blog_love_blog_Award.jpg
I was courious was it meant so I Googled it. "Liebster" meaning dearest

It is an award for blogs with less than 300 followers. That's me! And to promote a gathering among others on lower known blogs. I guess a boost up so to speak. So thank you Patti!

I'll be sure to pass it along to three others in my blogging family that i subscribe too.

I also want to Welcome my new followers. I have added a few more this week!

More card, Layouts and coupons to come!

Monday, February 21, 2011

20

Our daughter turned twenty last year and I got the opportunity to SB the LO this weekend.
Here is the completed page.

I used K&Company for the back ground paper
The 20 is chipboard from Basic Grey that I inked pink
The stick pin (Making Memories) and ribbon (Michael's) I put in the center accented the matting.
The brackets are from a Cricut Cartridge
The cupcake and HAPPY BIRTHDAY are a SU punch and die cut
Bling is from White Blossom

Entering this in Sketchy Thursday (sketch turned 90 degrees)

busy bees


These are pictures when our twins were 2 years old - love looking back since they will be 18 this year!!!
Paper from DCWV and K&CO.
Butterflies from a Sizzlit from SU!
Bees from Doodlecharms Cricut carts
Title from Cricut as well
Entering this LO in the challenge at Sassy Lil Sketches

Thanksgiving Day Football game LO


Used SU DSP for the base of the LO

Cut the football from Everyday paperdolls and ran it through an embossing folder to give it the leather look. Added white gel pen for laces.

Entering this in Fantabulous Cricut - to emboss

Inspired by Maine


Being in Maine - it was a beautiful clear sky weekend. I made this card for my daughter. All items are from SU!
I am entering this in Sentimental Sunday's challenge
Allsorts - inspired by Nature
Try it on Tuesday - skies the limit
Frosted Designs - no pattern paper
Fantabulous Cricut -embossing on a card or LO

Sunday, February 20, 2011

Back from Maine


I had a great time - I got 23 scrapbook pages completed !
Had a great time and our group was awesome. We are doing it again in November.

Thursday, February 17, 2011

Off to a weekend of scrapbooking

I got an invitation from my Stampin' Up Demonstrator to go to Maine for the weekend to scrap and make cards for the weekend!!!

A nice little get-a-way and will miss you all! We leave at 8:00 a.m. Friday.

I'll be back online to visit blogs, emails and challenges Monday night at the latest.

See you soon! happy creating and hopping miss you all!

Sheryl

Pyramid Triangle treat box

Hi All,
I had this little craft sheet from Joann Craft store forever! One of those freebies that you always get around to doing!
It kept surfacing in my to do pile and I used it to create a little treat box for my matching card too!.
So the first thing I had to do was scan the Info sheet side with the pattern side and try and enlarge it inside paint/MS Word.
If you would like to make this I had to tweak the pattern a little to have the holes line up and the sides to fold. See my pattern below.

You see the original from Joann Craft store above.

I moved the holes on the fold over tab and trimmed the side panels to an angle to form the pyramid. (but check yours before you punch!) - Cut, score fold. I glued the back to the sides flaps and used the string to tie the front to the box - this allows the recipient to open and get the treats out and still keep it intact.

Here is my sample - the finish size of my enlargement (hee hee - tiny) treat box is 2 1/2" L and 2 3/4" H
The image is from Toucan Scraps

CRAFT challenge Guest Design team week 3

a
Hi all, week 3 as a Guest Designer for February at C.R.A.F.T. Challenge Blog and this week the challenge is "Not a Card". Won't you join us?

Toucan Scraps - is the sponsor in which I bought this lovely silhouette!

I will have directions on how to make the pyramid box in the next posting which is adapted from a leaflet from Joann Craft Store!

Background stamping is from SU!
Cardstock is SU
Ink is brown Stazon and dark brown Color Box chalk ink.
Misc jute/fiber to tie it together
Foam strips to raise the mailbox and the whole image on the box.
Coluzzle oval template to cut out the image.
Pattern from Joann

Wednesday, February 16, 2011

blissful thoughts of days gone by


So I didn't really know what to call this card, but looking at the image, it is very peaceful or thoughts of days gone by and that incorporates with the ABC Challenge blog - O for old vintage, I distressed the edges of the image with my scissors and my ink.
I used the layout sketch from Mojo Monday and the image if from Toucan Scraps. Card stock from SU, border punch from EK Success. Misc fibers and the metal dots are from Walmart.

Tuesday, February 15, 2011

Welcome New followers!

I see I have a few more followers and would like to welcome you to my blog.
I hope you find it fun and informative.

A little about myself - I have always been a crafter, it started as a child, my dad would buy me colored pencils and crayons and large coloring books. I would color for hours. He even bought me shrinky dinks - the original! way back in the 70's... shhhh am I that old (?)
I got into sewing and taught myself when I was 20+ made my children pajamas, Halloween costumes and also piece machine quilting. For the past 10+ years I found paper crafting again - scrapbooking and now the forever never ending card making.

I eat up any type of paper crafting and paper folding! Love to watch youtube crafting and techniques.

With three older children - I fill my time with crafting, blogging and yes now texting with my kids - LOL!

Please leave a comment so I can find you, feel free to subscribe to email feeds and also poke around to past entries.

Welcome!

Sunday, February 13, 2011

Bug bug go away


My sister told me that her little boys is ill. So I immediately went to work to create this card for him. This is a little whimsy card for a little boy. So I tried to make it in that light.

I am entering this in a few challenges Cuttlebug Spot - Step Card, I haven't made one in awhile and was excited to make one again - this one is called a side stair step card! Prairie Fairy Friday wanted to see fine print somewhere on the card - which I printed on the computer "bug bug go away" in continuous print which worked out well for the idea of a bug at Paper Cutz Challenge. Color scheme of N for neutrals at The ABC Challenge blog.

Sentiment is a Cuttlebug embossing mini folder that I won last year. Embossing both Sizzix and Cuttlebug. The butterfly is from SU and the caterpillar is a Sizzilits

Less is More - one layer card


So I took on the challenge at Less is More blog to make a one layer card with flower or tree (hope shamrocks count if not I'll make another card - which I would love another challenge!)
I took the one layer meaning nothing but the base card! Hmm... I immediately thought I would make score lines into the base as a frame using my Martha Stewart scoreboard to take the place of another card stock or layer.

I did two lines around as the frame and then did my stamping. The sentiment and frog from Studio G. (so cute!)
Since I can't add bling I used my sparkle glitter pen and glittered up the poor little frog.
EDIT: I am told I could use bling! Just keep it to one layer - meaning cardstock I believe.
Yahoo - I'll go back and add green rhinestones to the shamrocks. hee hee

Added multiple shamrocks to the corner and inside of the card.

Also did some scoring around the inner sentiment.

Class Project with Elsa

I was excited to attend Elsa's Ustream class last night where we made a min album with a technique she create by taking a 12 x 12 piece of double sided card stock and a few scores with the Martha Stewart scoreboard some folding, a cut here and there - and you create a fabulous flip page for a mini!! We did two last night together and I did one right after.

I proceeded to make my cover after class which I cut from chipboard and covered it as well. I cut my cover pieces at 6 1/2 x 4 1/4". I think Elsa is doing a class in a couple weeks on how to bind it and make the tags. But I went ahead and used my Cinch last night to bind it and will make the tags later.

I have not completed my inner embellishments or the closure - but I think the beauty of the K&Company paper is gorgeous and wanted to show you and Elsa!

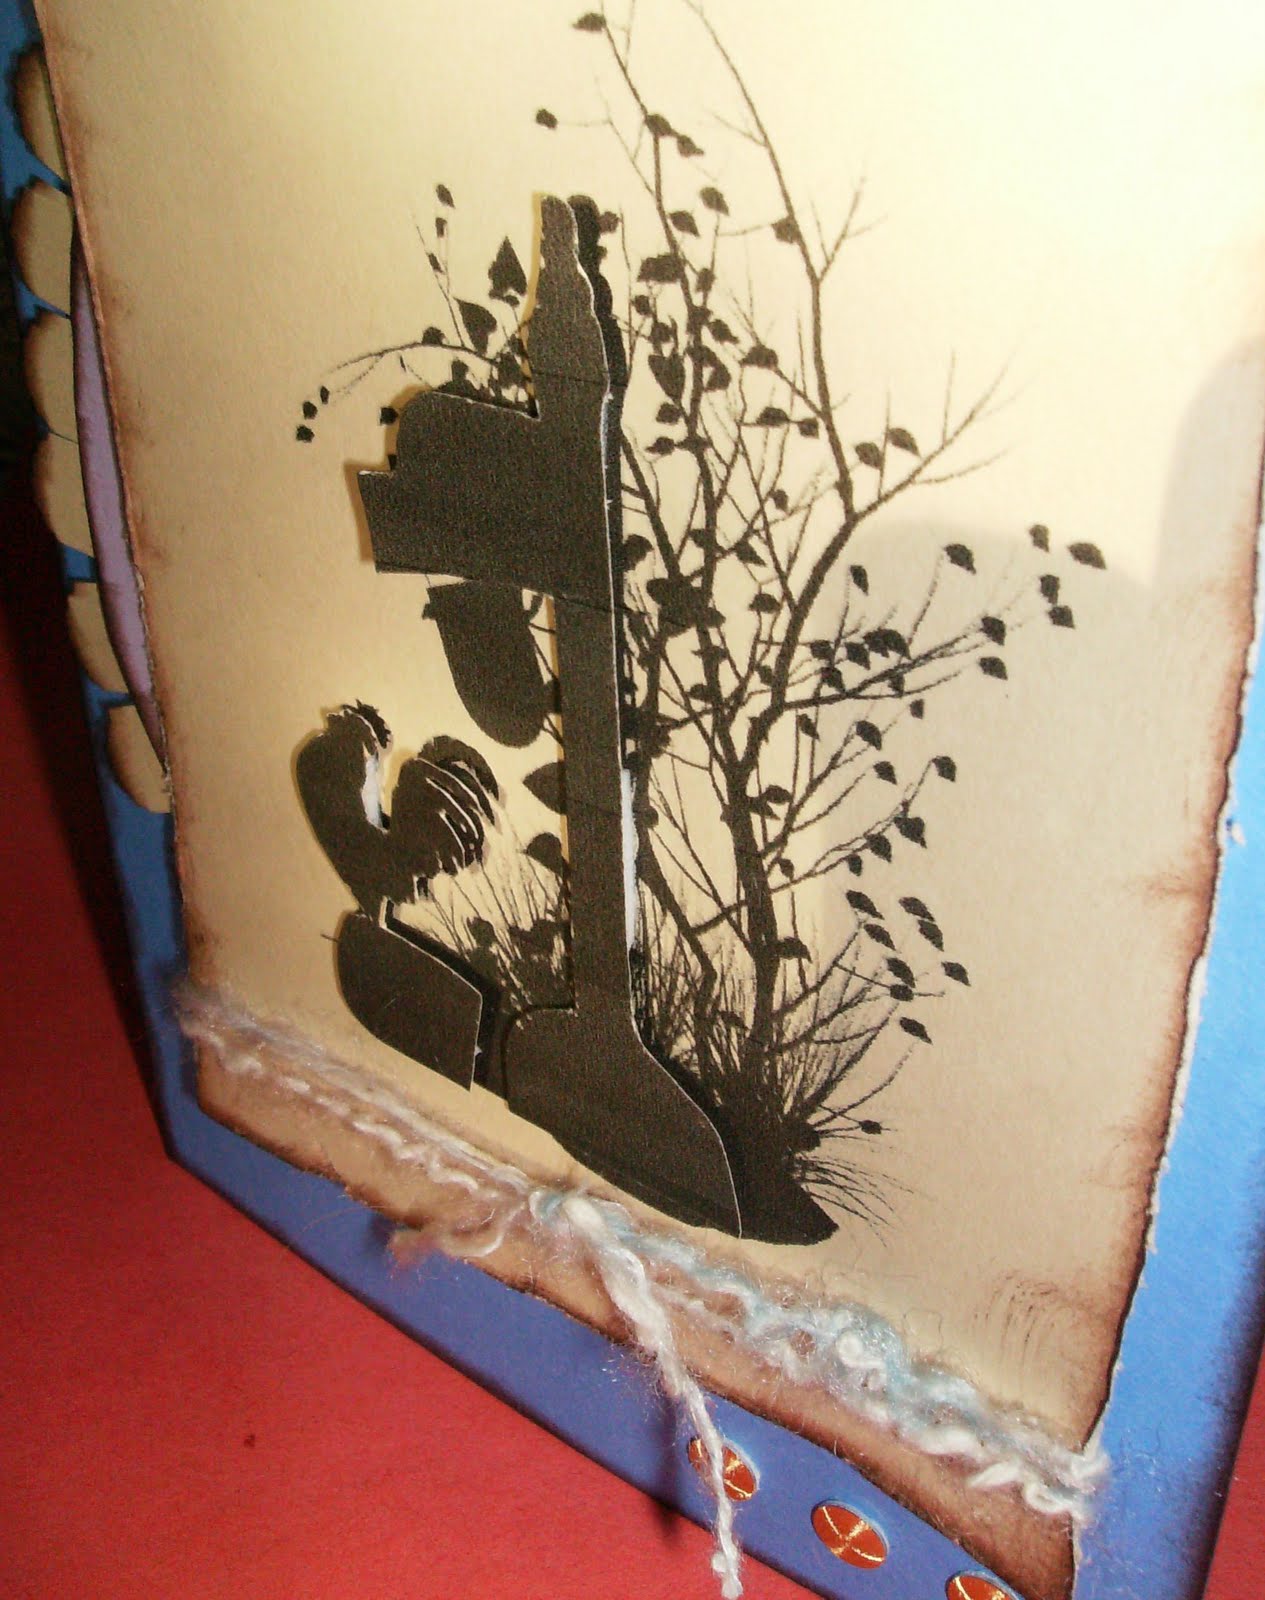
This is the cover - that bird is like a suede actually in the card stock! I chose that portion of the 12 x 12 sheet and I think it looks great. I added a border of card stock using a MS punch. Made a medallion from a left over piece of a calendar. Added rhinestones to set of the cover.

Here are the inner pages: (I should try and video with my new Flip I got for Christmas) Sorry this is picture heavy - It has 3 pages (6 sides)and lots of flip up and pockets.

Here is the back paper - so fabulous from K&Company!
When I complete it - I'll show it again!

Thanks for looking and please check out Elsa's blog she is so sweet and her classes are wonderful. Hers it top rate! She explains and actually gives you the measurements and waits for all to catch up!!

Repurpose an old calendar

A friend of mine gives us a very large calendar every year with beautiful scenery images each month. So as I was waiting for Elsa Ustream class last night - I had my Martha Stewart Scoreboard out for the class and this 2010 calendar was staring at me - well not really... so while I waited, I made a couple envelopes! I hate to waste the beautiful images.

I tried to follow the instruction on the envelope attachment - but her A2 are a little too big for our traditional A2 cards. I guess it's to allow for bulk perhaps.

So if you have a Martha Stewart scoreboard and want to make your own envelope in literally less than 2 minutes.
Here is what I did -
Cut a 8 1/4 x 8 1/4" (hers said 8 1/2 x 8 1/2" - but it was too big for my liking.
Score as directed 3", turn 3 5/8" turn, 3" turn, and last 3 5/8"

Snip out the little funky pieces where the scores intersect.

Now - I do one extra step - I fold up the bottom triangular piece and snip it off straight across for a more finished look.

Add some glue

and you are done!