Showing posts with label gift. Show all posts

Tuesday, December 24, 2013

Trivets

I created these as Christmas gifts for my in-laws.
I bought them from Home Depot in the tile isle.

Stamped on them with the Martha Stewart Butterflies and sprayed seal them with a sealer that goes to 500 degrees.

Added felt squares I picked up from Ocean State Job lot for a quick and fun (useful) gift.


Monday, December 16, 2013

Coasters gift set

I created this set for my son who is a huge Bruins fan. I cannot wait to give this to him next week for Christmas!

Using tiles I cut out and decoupage the logo to the tiles and sprayed adhesive sealer over the top a couple of times for a protector.

Wednesday, May 15, 2013

DPhiE keychains

I made these for my daughter and two of her sorority sisters. This and the next items are actually post graduation gifts which I will be mailing today. Hope they like them!
 I printed the image onto photo paper, used my 1" circle punch and used a strong glue to glue it to the metal bottle cap.
I used a bubble (sorry don't know the official name) clear dome sticker to cover and protect the image.
I proceeded to use 7 links of a thick chain and placed it through the bottle cap and the key ring.
I bought some lobster claw charms from Wal-Mart in the sorority colors (gold and purple) and added them to the links for a little dangle accent. (Ignore the pink blur in the photo - my G2 cell phone is experiencing a white balance issue)

Tuesday, May 14, 2013

SU Bottlecap keychain

I made this for my Stampin' Up friend Judi.
She sells SU and is moving to Florida and I'll miss her, but look forward to the opportunity to see her there at some point for a visit!

I made this for her, while it is not what I originally intended to do with the bottle cap, I like it just the same.

Sorry if the picture is bury, the glaze/covering over the paper images and accents give off a slight glare.

I used a 1" circle punch to punch out the Stampin Up logo that I took from the back of the spring catalog. To retain the curved sides I kept the shape and just trimmed the top and bottom of the logo because it had bright white paper and I wanted a more printed background.
I used the 1" circle punch again and punched out the circle from Designer Series Paper. Sorry don't know the line as I am not good at remember... I just go for what I like!
Using the embosslits, I punched out the butterfly and the heart also from the same double sided paper, but used the other side!
Glued it all down and placed a 1" clear bubble over the images to preserve and protect. I was going to use a glue but time would not been on my side as I made it before I went to Judi's last class.

I like how it came out and plan on making more with different images and words.
Best of luck Judi!!! I'll miss you - but will see you in FL!

Hope Judi don't kill me - ha ha. Here is a pic when we were at our weekend crop in Maine in 2011. We had fun, with a small group. During one of the days, her and I walked the Marginal Way.

Monday, May 7, 2012

Snap bags

I bought one of these snap type purses at a craft fair last fall and vowed to make them... on my to do list! Here is a sampling I made this week. I bought more fabric and will be showing more in a variety of colors and sizes.
Here is a video showing how they are styled.

Monday, February 20, 2012

Saturday, January 21, 2012

Sweet treat NERDS box quick cover up


As I am making little things for my daughter and her friends, I had 6 boxes of these NERDS treats and covered them with 4 1/4 x 2" of scrap paper I had in my pile and then punched with the Hearts border from Martha Stewart - cut at 1" x 4 1/4".

Wednesday, November 30, 2011

Corded Beaded Bookmarks

Here are a grouping of bookmarks I made for my craft fair table on Sunday.

Here is a video for your viewing of the details and how to.

Tuesday, November 29, 2011

Ribbon Beaded Bookmark

This was on my crafting to do list - please enjoy the video on how I made these bookmarks.

Thursday, September 15, 2011

Domino Necklaces


I am making these to sell at a craft fair!

These started out as a white mini domino. I Adirondack inked it, then Stazon Stamped it. The next day I added silver pearls and the top layer of glaze. Added a slider closure using the brown cording!

I made several but this one is my fav!

Saturday, August 27, 2011

Photo display wooden cube


I needed a break from working on my walls for the day (preparing them so I can paint soon) and needed to make a gift for a friend of mine, whose birthday is today. I was suppose to baby sit for her tonight so she could go out to eat with her husband - but with Irene dropping a lot of rain on us it was postponed. Gave me time to create some items for her!

I first painted the wooden cube with Americana brown rust acrylic paint.
Mod Podge 2 3/4" x 2 3/4" pattern paper (MME Bella Bella) (inked edges as well).
Added beads to the photo holder wire to accent it.

Next to make a matching card!

Sunday, May 8, 2011

Wooden cube Photo holder


I made this tonight for my MIL.
Paper from K&Company, font stickers from Colorbok, misc beads. Mod Podge to seal the pattern paper and some acrylic paint on the edges.

Here is a very short 2 min video. (a little dark until I get a second light)

Saturday, April 9, 2011

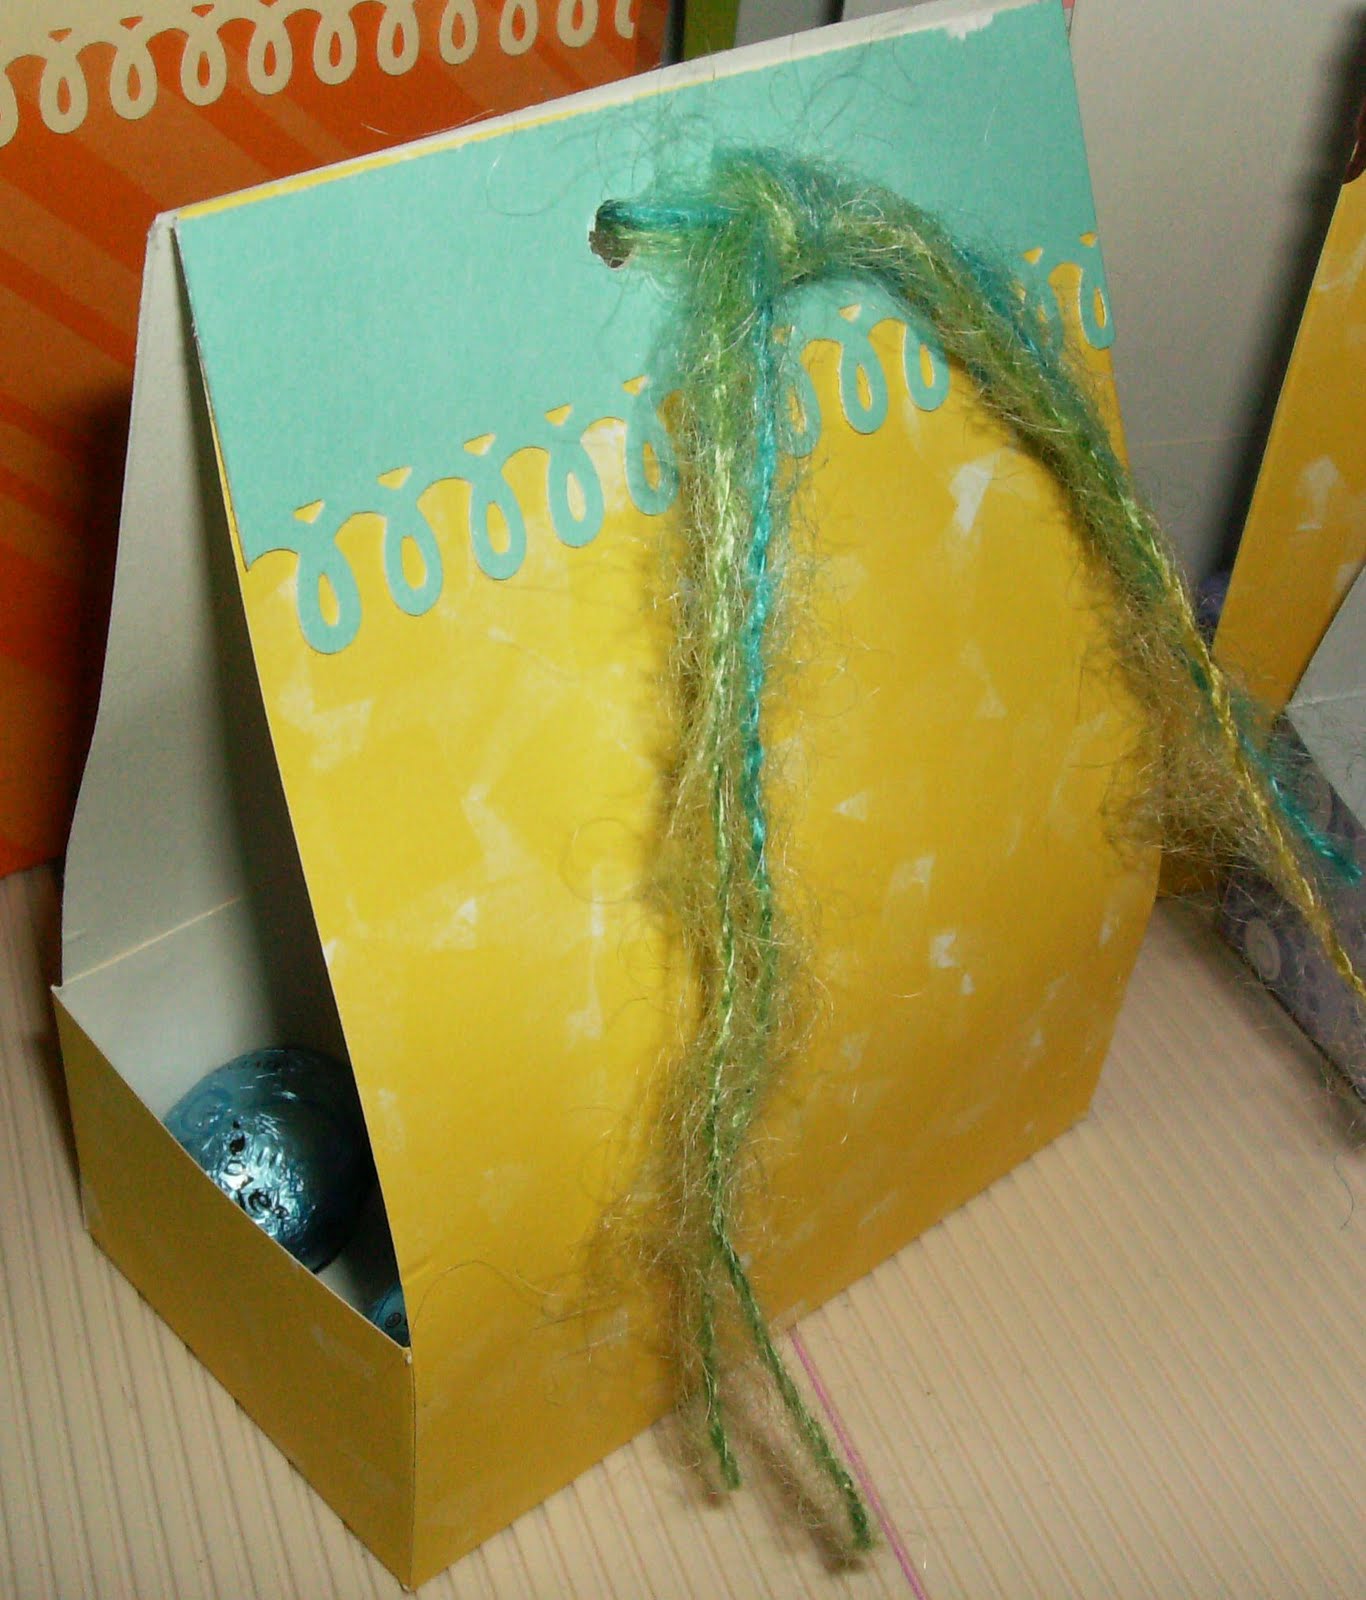
Directions for Mini Box Treat Bag


Here are the directions to make the box treat bag.
I made ten and used 5 pieces of 12 x 12 pattern paper, left over scraps for accents and yarn.
You can see more variety in my last post.

Friday, April 8, 2011

10 Little Exploding gift boxes


I made these to be sent to my daughter and her friends in college. I am making a box of goodies and will mail them all on Monday. So I will be posting more treats.

I recently got one of these mini boxes at a craft camp and tonight I measured out how it was made and drafted up directions. I promptly used my scraps to make 10 of these. Boy do I have a huge scrap pile! Feels good to use up the pieces.
I put two Rolos inside - I could probably have fit three .. but I didn't have enough from the bag... umm... a few ended up in my mouth..

In my next post I'll write out the directions for this 1 1/2 x 1/2" box with lid.

Sunday, April 3, 2011

Spring Mini Butterfly notebook


I am visiting my sister today and wanted to make her one of the mini note pads I created yesterday for a friend. I made this one a little different.
Base pad cardboard size and paper is 3 3/4" x 5"
Pattern paper from American Crafts glued and inked around the edges.
Border punch at 1" and 3 3/4" in length from Martha Stewart
Center embossed area 2 1/4" x 3 3/4" from SU Finial Embossing folder
Butterfly punch from SU and embossed using the same folder
Added Rhinestones from my stash
Bind it with my CINCH
Tied on a 5" piece of ribbon to the Owire (Target or Michael's ribbon)

Entering this in a couple springtime challenges
Prairie Fairy Fridays
And at Charisma Cardz - bling and Sparkles

Saturday, April 2, 2011

Spring Bird mini notebook


I made this notebook this morning for a gift to a wonderful lady who put together our Spring Fling event today. We made some wonderful Stampin Up cards and gift items and had a great time.

Here is a gift I made and surprised her with it!
I saw a video last night while blog hopping - and I saw this great idea at Kinder Stampo's blog. While my cover is totally different I took her base size measurements and went to work to crate my own early this morning.
The card board was cut at 4" x 5", the cs for the cover and the back cover is from SU! also cut to 4 x 5"
Then I cut a couple strip, punched bordered it glued it to the middle of the top cover - embossed a piece of white cs with a SU embossing folder and foam raised the two punch bird on the front - simple!

I cut the inner blank pages from printer paper also cut at 4 x 5.
Layers it altogether and I bound it with my CINCH.
My next one It'll take measurement of the pieces as I just quickly cut and it all worked out!

Entering this in the Prairie Fairy Friday Challenge

Sunday, March 13, 2011

Easter card and candle set


I made this as a gift for Easter.
The card stock is from SU as well as the swirl stamp.
The border punch is from Martha Stewart
The oval is a 1 1/4 x 2" oval punch.
Ribbon - I think from Michaels as well as the pearls.

The votive holder is 3" height and you take a 8 1/2 length piece of card stock and score at 2" 4" and 6" and 8". Punch the ovals so the light so through - I am sorry my pictures are not very good. But I think you get the gist. (Inside I used a battery operated tea light from Michael's)

I'll be entering this in a challenge or two when I find my listing.
Thanks for looking if you have any questions please let me know.

Monday, March 7, 2011

Jumbo clothes pin decorated


Hi all,
What a rainy day for us here in the east. Last night I painted this jumbo clothes pin I bought at AC Moore for 1.00 with Apple Barrel antique rose paint.

Cut Stampin' Up Designer series paper to cover the front and the back, added SU rhinestones to the center of some of the locations.

I recently bought 6 different colored ribbon also from SU (this ribbon I love - it's softer and easy to tie) added the two step punch bird on foam dots.

I will be giving this to my friend for her birthday this week.

Thursday, February 10, 2011

Heart room fresh scent gift idea


If you follow my blog - you know I made some Applesauce ornaments at Christmas time.
Because the heart is a great solid non intricate design, I knew I wanted to make these for Valentine gifts to my daughter and her friends. I thought they could hang them in their apartment or closets.

To make these you take 1/2 cup of applesauce and a 1/2 cup of cinnamon.
Mix together and roll out to 1/2" thickness, take a cookie cutter of your choice and cut and transfer to a wire wrack or cooling rack so it can air dry.

If you are going to hang them - use a straw to make a hole in the top.
I added rhinestones and pearls to the front and applied glitter to the sides.

I linked this to Passionately Artistic for Valentine ideas


linkingpartybadge copy

Wednesday, December 15, 2010

Tissue Box Cover - gift idea


Hi - I hope you are not sick of seeing these on my blog.
I am making these for gifts (they are Puff Plus version and I hope the box is a standard size for refills!!)

This time I did the top cover a little different I punched the border punch into the lid as oppose to adding it as a separate piece.
Spellbinder die used on the cover and front accent, D'Vine swirls used on the side panels for embossing