Showing posts with label tutorial. Show all posts

Friday, July 22, 2016

Center stair step birthday card

I saw a similar scene card on Pinterest (I'm into scene cards lately) and wanted to try it out and make a birthday card to have in my stash.
Here are the steps I made to make this card.
I made a center stair-step card with 1-inch side panels.
Cutting a separate piece of card stock at 3 1/8" x 3 3/8" I used the following SU ink to sponge the background. Starting with the lightest color.

The sentiment piece is 3/4" x 5 3/8"

I removed the sun mask and sponged a little over it to soften the edge.
Then with a stamp from Studio 111 (Michael's craft store clearance for .50) I double stamped the image over the 3 panels.
Bird and sentiment from Stampin Up.

Sunday, July 17, 2016

Directions on scene card

I made another scene card, this time it was requested that I make a one layer card for a friend. Because of that I was able to take step by step pictures.
 I die cut a 2" circle from a piece of white card stock and temporarily glued it to my base white card.
I placed a scrap piece of card stock to cover / mask off the top 2/3 of the circle.

 Using these three colors I sponged the ocean to the open area of the circle.
 This was the results.
 Taking a 1" circle I temporarily glued it to the left middle of the scene, this will create the setting sun or moon depending on how you view it.
 I then flipped the mask to cover up the ocean to now create the sky.
 These are the colors I used to sponge the sky.
 This is the results. I then took Wild Wasabi ink (not shown) and stamped the sea grass from SU set Wetlands a couple times. I added the sentiment as well, oops a little crooked. Darn.
To finish it off I scored lines all around.

Monday, June 18, 2012

4 step card note card

I was inspired by a card on Pinterest where a circle was the template, here I used a butterfly where I sponged just inside the template and stamped the image on top.
I punch the bottom to give it a fabulous edge where the original post on Pinterest did not. I then added a 3/4" x 4 1/4" strip of matching textured card stock.
All items from Stampin' Up.

I'm making a set of 4 as a note card gift set. You can see the set and the holder.
Step one - hold template against base card, and sponge ink around the inner portions of the edged stencil.
Step two - remove stencil and stamp image over sponged shape
Step three - using a border punch, punch the bottom of the card front
Step four - cut a coordinating piece of card stock at 3/4" x 4 1/4" and glue to inside of card so the border peeked the color through when card is closed for mailing.

Hope you give it a try!

Thanks and please leave comments so I may visit your blog or pinterest wall.

Thursday, May 31, 2012

Crochet Anklets


On Tuesday I was reading the latest email from a Crochet company and they talked about making crochet bracelets/anklets.
I am not a huge crocheter, but I like little easy items. So I read through the easy chain stitch directions and set out to bring my stash of beads and thin yarn/thread to my crochet group I attend on Wednesday.

(sorry for the glare off the table)

I made a couple per the directions (which I gave away last night) and then changed the directions my way and created the one below for myself.

The faceted beads in this one is a little larger than the metal beads in the first one above. I am running low on the metal beads so I wanted to try my hand at the clear faceted beads on the gold thread.

The way I made mine was as follows:
1) Thread about 10 - 12 beads to the ball of string and leave them on there until you need to move one up. 
2) leave 6" of thread as the lead off tail, then ch 6, move one bead down and ch over the bead,
3) ch 6, then move down another bead and keep repeating till it fits your ankle
leave 6" of thread to end off the anklet to allow for tying.

I'll make a video a little later this week and post it.
thanks for looking!

Friday, November 18, 2011

Wooden Spool Ornaments


I bought the Better Homes & Garden Craft magazine and these ornaments and how to make them were in there.
I couldn't wait to give it a try, all I needed to buy was the thick black wire and I made 14 of these for ornaments. The music on them are Christmas songs that I strategically cut and glued on.

Hope you give it a try! Please enjoy this short video.

Saturday, September 24, 2011

Accordion Card


I learned this accent for a card from She's a Sassy Lady
You make the traditional according piece but you layer it behind an aperture. In this case I used my Spellbinder dies to make the window and frame. Glittered with martha Stewart glitter and the swirl is from Sizzix Tim Holtz die. Added some paper Prima's and glitzy and gems.


Another card for my daughter... now to figure out how I am going to ship it with out it getting crushed, probably a bubble envelope.

Sunday, June 26, 2011

How to make pocket pages for my mini

Hi Folks
I created this quick how to - to show the easy steps to make a double pocket page
All you need is an 8 1/2" x 11" piece of card stock and a 12 x 12" piece of pattern paper.

Sunday, May 29, 2011

Post it notes favor male version


Hi Folks - I made these last night to hand out to the male attendees as a thank you for attending our sons graduation party in a couple weeks.

Here is a video on how I made them!

Saturday, April 9, 2011

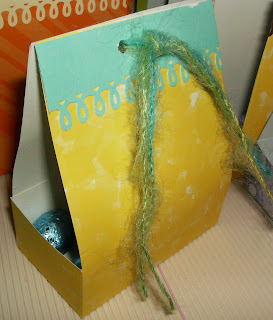
Directions for Mini Box Treat Bag


Here are the directions to make the box treat bag.
I made ten and used 5 pieces of 12 x 12 pattern paper, left over scraps for accents and yarn.
You can see more variety in my last post.

Friday, April 8, 2011

Directions for little exploding gift box

As seen in this post, I have written out directions to create these little cute boxes.
Hope they help you too, as I created 10 for little gifts I kept them plain as I have more little gifts to create. Wouldn't these be cute as a place setting at Easter?!

Click on pics (Page 1 and page 2) and save them to your hard drive.

Thursday, February 17, 2011

Pyramid Triangle treat box

Hi All,
I had this little craft sheet from Joann Craft store forever! One of those freebies that you always get around to doing!
It kept surfacing in my to do pile and I used it to create a little treat box for my matching card too!.
So the first thing I had to do was scan the Info sheet side with the pattern side and try and enlarge it inside paint/MS Word.
If you would like to make this I had to tweak the pattern a little to have the holes line up and the sides to fold. See my pattern below.

You see the original from Joann Craft store above.

I moved the holes on the fold over tab and trimmed the side panels to an angle to form the pyramid. (but check yours before you punch!) - Cut, score fold. I glued the back to the sides flaps and used the string to tie the front to the box - this allows the recipient to open and get the treats out and still keep it intact.

Here is my sample - the finish size of my enlargement (hee hee - tiny) treat box is 2 1/2" L and 2 3/4" H
The image is from Toucan Scraps

Sunday, February 13, 2011

Class Project with Elsa

I was excited to attend Elsa's Ustream class last night where we made a min album with a technique she create by taking a 12 x 12 piece of double sided card stock and a few scores with the Martha Stewart scoreboard some folding, a cut here and there - and you create a fabulous flip page for a mini!! We did two last night together and I did one right after.

I proceeded to make my cover after class which I cut from chipboard and covered it as well. I cut my cover pieces at 6 1/2 x 4 1/4". I think Elsa is doing a class in a couple weeks on how to bind it and make the tags. But I went ahead and used my Cinch last night to bind it and will make the tags later.

I have not completed my inner embellishments or the closure - but I think the beauty of the K&Company paper is gorgeous and wanted to show you and Elsa!

This is the cover - that bird is like a suede actually in the card stock! I chose that portion of the 12 x 12 sheet and I think it looks great. I added a border of card stock using a MS punch. Made a medallion from a left over piece of a calendar. Added rhinestones to set of the cover.

Here are the inner pages: (I should try and video with my new Flip I got for Christmas) Sorry this is picture heavy - It has 3 pages (6 sides)and lots of flip up and pockets.

Here is the back paper - so fabulous from K&Company!
When I complete it - I'll show it again!

Thanks for looking and please check out Elsa's blog she is so sweet and her classes are wonderful. Hers it top rate! She explains and actually gives you the measurements and waits for all to catch up!!

Repurpose an old calendar

A friend of mine gives us a very large calendar every year with beautiful scenery images each month. So as I was waiting for Elsa Ustream class last night - I had my Martha Stewart Scoreboard out for the class and this 2010 calendar was staring at me - well not really... so while I waited, I made a couple envelopes! I hate to waste the beautiful images.

I tried to follow the instruction on the envelope attachment - but her A2 are a little too big for our traditional A2 cards. I guess it's to allow for bulk perhaps.

So if you have a Martha Stewart scoreboard and want to make your own envelope in literally less than 2 minutes.
Here is what I did -
Cut a 8 1/4 x 8 1/4" (hers said 8 1/2 x 8 1/2" - but it was too big for my liking.
Score as directed 3", turn 3 5/8" turn, 3" turn, and last 3 5/8"

Snip out the little funky pieces where the scores intersect.

Now - I do one extra step - I fold up the bottom triangular piece and snip it off straight across for a more finished look.

Add some glue

and you are done!

Monday, February 7, 2011

Hershey Mini Briefcases


I made these tonight to send to my daughter and her friends at college.
Since they are older girls... I made the super simple briefcases.
If you make them use super strong/thick card stock. Mine is super sparkly embossed card stock. I made it so it will hold 4 Hershey Mini chocolates back to back.

Cut a 3 1/2" x 6" piece of card stock
Follow the diagram or email for more details.

I used eyelets and tape to keep together.
Added an 8" length of ribbon for the shoulder strap and a small piece of super strong Velcro

let me know if you make them! Please leave a comment too - would love to visit your blog!
I have linked to :

all crafts Handmade Projects ~ Add Yours!

Monday, January 17, 2011

note pad step by step using the Cinch

As mentioned below I got this idea from greenbean's crafterole.
Step one: Gather some old gift cards (they make sturdy covers) punch holes in them with a Crop-a-Dial or a binding machine - I used my new Cinch and punched 6 holes in the cards.

Step Two: Punch card stock or in my case I had a draw full of note cards - which I cut down to 3 3/8" x 2 1/8" and punched 6 corresponding holes.

Step three: Clipped 6 O-wires - I used 3/4" wires (hint leave the little hanging piece on the end to attach it to the machine)

Step Four: Put on the paper as you want to use it - meaning if you want lines or are using decorative paper and you want that to be facing you when you open your little note pad - put that on the O-wires first!
Then put the cover on as you would see it in your purse.
Then lastly - very important put the back cover on - but back wards.
Step Five: If you using the Cinch - back up the O-wires so that the opening is flush with the back. Keeping your hand on the wires, take the free hand and lower the handle and stoop down and watch as the loops touch the closed area.
Step Six: Clip the little over hang wire and flip the back cover over and you have a completed note pad!